How to Change Your Kindle Fire Wallpaper
Customize Your Tablet's Background Picture With Your Own Photos
FTC Disclosure: If you make a purchase via a link on this site, I may receive a small commission. There will be no added cost to you. Thank you!
Unfortunately, on older models, Amazon didn't let you change the Kindle Fire wallpaper, although the tablet did come preloaded with several basic background pictures.
Fortunately, with a little finagling we can work around this issue (without rooting our device) by using one of my Kindle tricks and tips.
Update! For newer tablets (2015+) please see the updated note below.
In 2012 Amazon added stronger blocks on their new Kindle Fires and since then we can't change the background wallpapers on any of the newer tablets. :(
Please note that the tutorial on THIS page is only for the original Kindle Fire (2011).
However, for tablets released since 2015 (and most 2014 models) you can now change your Kindle Fire background wallpaper! See my step-by-step tutorial for all the details.
Kindle Fire Wallpaper Preparation
There are two parts to this overall process. The first is to side load the Rotating Wallpaper app onto your device.
Go do that first and then come back and finish this tutorial for changing your Kindle Fire wallpaper.
Have you gone "there and back again"? Alright, let's start part two of this process- it'll be fun!
Kindle Fire Wallpaper Tutorial
To keep things simple, I'm dividing this tutorial into three main steps:
- Resize Your Photos
- Load Photos to Your Kindle Fire
- Add Photos to Rotating Wallpaper App
It's really quite easy, I promise! However, you will need a way to transfer the files onto your Kindle Fire. See step two for details.
1. Resize Your Photos
For your photos to properly display using the Rotating Wallpaper app, you will need to resize and crop your photos and then increase the canvas size to 1024x1024 pixels.

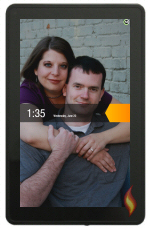
The real issue, though, is that only 515x880 of the image is what shows up on your Kindle Fire's wallpaper. Most photo editing software packages have the capability to resize and crop photos.

For those who don't have photo editing software on your computer and/or aren't sure how to do this- don't fret! I've typed up
an article on how to resize your photos to use as a Kindle Fire wallpaper, and this tutorial uses a free online editor. How sweet is that?!
If you'd prefer not to mess with this you can try using any photo as is,
or even just crop it to 1024x1024, although the wallpaper won't display
the entire image since it will be zoomed in. Below is one example of this.
However, this usually works fine with abstract pictures that don't have a specific item of focus.

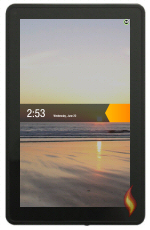
Once your photo has been resized, cropped, and set to the right dimensions, you'll be ready for the next step of the process. If you're not sure how to do this, be sure to follow my photo resizing tutorial mentioned above.
Free Kindle Fire Wallpapers
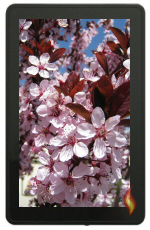
How about some free wallpapers for your Kindle Fire? I thought it would be great to add some free photos that you can use right now!
This zip file contains 10 beautiful pictures of flowers that have already been resized to fit your Kindle Fire. (I personally took these pics and grant you rights to use them for personal use.)
Just download the file (it's less than 1 MB), unzip the files to your computer and then continue on to the next step to load them onto your tablet.
You can also see the flower pictures on my facebook page.
2. Load Photos to Your Kindle Fire
There are several ways to transfer photos from your computer (or other device) onto your Kindle Fire. Here are two options:
Option A:

Use an app to transfer files. I love using Wi-Fi File Explorer Pro. Although there's a free version of Wi-Fi File Explorer, you need the paid version (it's only a buck) to be able to transfer files to your Kindle Fire. For this to work you need your computer and Fire on the same Wi-Fi signal.
If you use this option just follow the app's instructions that pop up when you open it. You will type the URL it gives you into your web browser on your PC and be able to access your tablet's file directory without plugging in any cords. I love how easy this app is!
Option B:

Plug your Kindle Fire into your computer with a micro USB data cable. Your tablet does not come with this accessory. The exact cord you need would have a USB 2.0 (micro-B connector) at one end and a regular USB connection at the other.
My phone's cable works perfectly, so you might already have one that will work for you.
When you plug in your tablet you will need to tap the power button and swipe the screen. Once it's connected it should show up on your computer as a KINDLE drive.
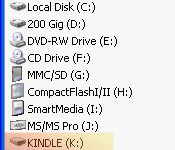
Once
you're connected to your tablet (using either option), find the "pictures" folder, and transfer
your photos there. For this tutorial, I created a folder within the pictures folder and named it "wallpaper"
(creative, huh?).
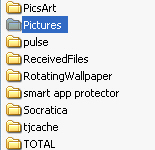
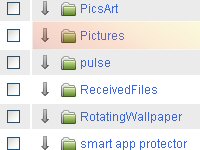
Now you're ready for the final step for adding your own Kindle Fire background pictures.
3. Add Photos to Rotating Wallpaper App
Now we're ready to add your photos to the Rotating Wallpaper app. If you don't already have it open, go ahead and open it now.
When you first open the Rotating Wallpaper app you get this Help screen. Tap "Close".
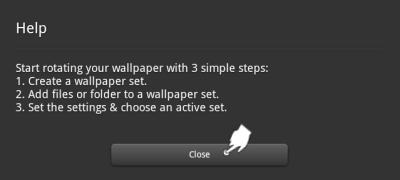
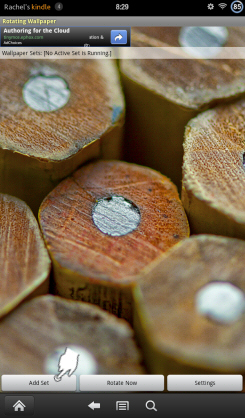
Tap the "Add Set" button at the bottom left.
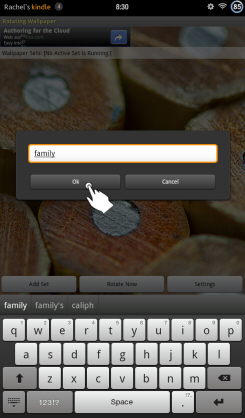
Tap the text field and type a name for your photo set. (In this example I use the word "family" since I will be putting pictures of my family in this set. Later, but not shown in this tutorial, I will create a set called "scenes" for my other photos.)
Tap "Ok".
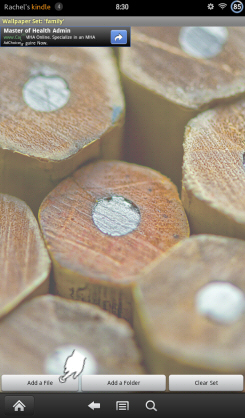
Now you are in the folder of the set you are creating. The name of the folder is at the top left, mine says, "family".
Tap the "Add a File" button at the bottom left. (If you want to add an entire folder of images, tap "Add a Folder".)
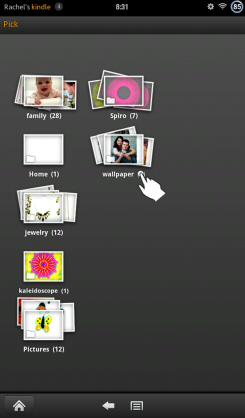
Your Kindle Fire photo gallery should open up.
Tap the group of photos called "wallpaper" (or whatever you named it during step one of this tutorial).
Tap the picture you want to add.

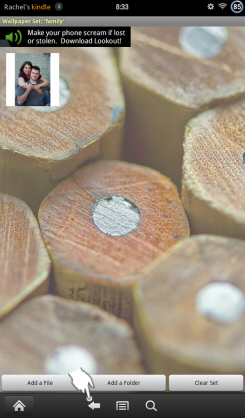
Now your photo has been added to the set.
Repeat the previous step to add any additional photos you would like in this set.
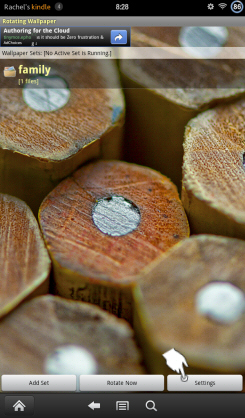
When finished, tap the back arrow. This returns you to the main window where you should see a folder with the name you gave the set.
Tap the "Settings" button at the bottom right.
In the settings screen, tap the "Active Wallpaper Set" option at the top.
Tap the name of your set to activate it. Mine says "family".
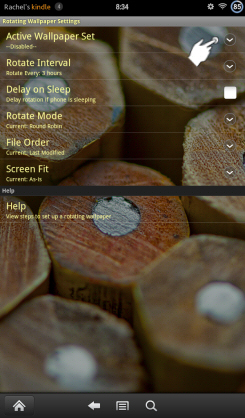
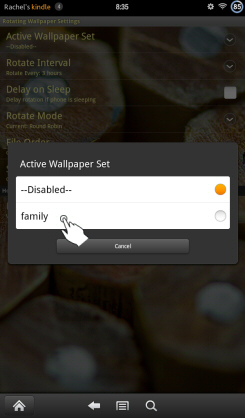
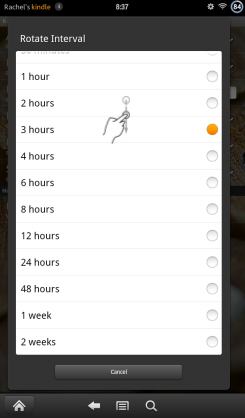
This returns you to the settings screen. Now tap the second option, "Rotate Interval".
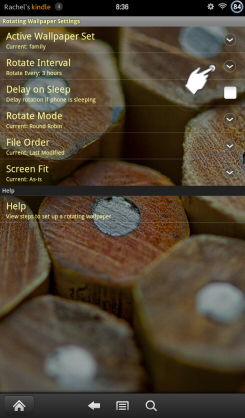
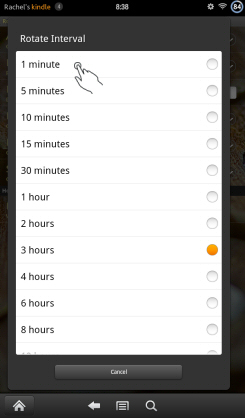
On the list that comes up, slide the screen down until you see the top.
Tap "1 minute".
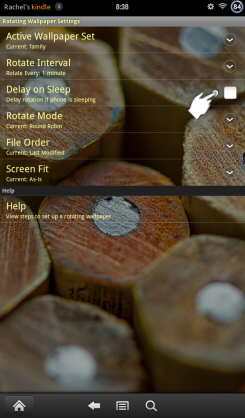
Back at the settings screen tap, "Delay on Sleep" to put a check mark in the box.
Tap the back arrow to return to the main screen.
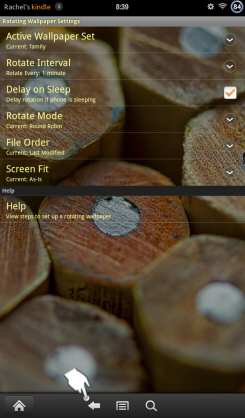
After one minute the background image will automatically change, as shown in the image below, but you can tap the "Rotate Now" button at the bottom middle to see how your image looks.
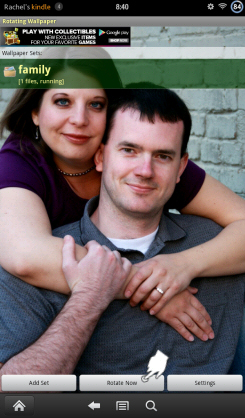
If you're satisfied with how the image of your customized wallpaper looks on your Kindle Fire then you're all set to go! You can test it out by tapping your power button so it goes into sleep mode, waiting one minute, and then tapping the button again.
And that's it!

Important Note!
When you first boot up your Kindle Fire your custom photo won't display until one minute has passed.
Also, after using your tablet and then pressing your power button, your image might not display until after a minute has passed. This is due to the rotating wallpaper's minimum setting of one minute.
Once your background image has displayed it should stay there until the next time you reboot. It will also rotate to the next image if you have more than one photograph loaded into the currently active set.
Of course, if you'd like an image to stay for more than a minute, you are free to change the setting to any of the other alternative options, although you may have to wait that amount of time until your image is displayed in place of the basic Kindle Fire backgrounds that come pre installed.
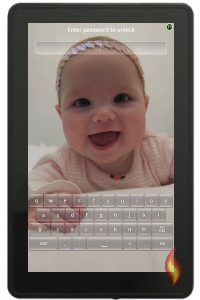
Here's one more example showing how I added a picture of my beautiful baby girl to my Kindle Fire's background wallpaper. (In this photo I already swiped the orange bar across the screen which brought up the password area. This way you can see my girl's gorgeous smile!)


Fire friend Bridget contacted me via my Facebook page saying "My Fire keeps resetting to one specific wallpaper (which I'm getting really tired of) regardless of what I change it to. Is there any way to make the one I want *stay* the one I want?"
I suggested that she changed to the wallpaper of her choice, then held the power button down for a full minute.
Bridget was happy to report back that this fixed the problem - handy to know if it happens to you!
If you enjoyed this tutorial please let me know or browse through my other Kindle tricks and tips. I put a lot of hours into this (which was actually fun, since I wouldn't be doing this if I didn't love it so much) so I would really love to hear how it worked for you and what you think.
You can also leave a comment on my Facebook page. Thanks!

Hand Illustrations provided by GestureWorks® (www.gestureworks.com). Aren't they perfect?



Leave a Comment:
I love receiving your comments, but please read the notes below before posting. Thank you!NOTES:
- I continue to receive questions I've already answered in my FAQ or in articles on my site. PLEASE check there first!
- All comments are moderated. If you leave the page you won't see your comment until it is approved.
- Select the "Post to Facebook" check box to be notified on FB when a reply has been posted.
- If you scan the previous comments you may find an answer to your question. Click the "View X more" link at the bottom (if visible) to see all comments.
- If you're having trouble accessing my exclusive Kindle Fire articles, please email me directly instead of posting in these comments.
Thanks for sharing!