Get Google Play Store Apps on Your Kindle Fire
FTC Disclosure: If you make a purchase via a link on this site, I may receive a small commission. There will be no added cost to you. Thank you!
Have you been frustrated with not being able to install Google Play Store Apps onto your Kindle Fire? Since Amazon and Google refuse to play together, Kindle Fire owners have to jump through hoops to access the Play Store.
After owning a Kindle Fire for almost two years, I finally learned how to get play store apps onto my Fire without rooting my tablet and without a smart phone!
I've simplified the process as much as possible to make this tutorial easy to follow so you too can get apps from the Google Play Store onto your Fire!
IMPORTANT 2017 NOTE!
THIS PAGE IS OUTDATED AND NEEDS TO BE UPDATED!
Please see the new detailed article on how to install Google Play Store on a Kindle Fire. This awesome new article works on the (relatively) newer tablets (see article for details).
If you have an older Kindle Fire you can try the exclusive Google tutorial which is only available to subscribers of my Kindle Fire Alerts newsletter.
If you're not already subscribed just fill in the form in the column on the right, confirm the email subscription, and you'll receive the link by email!
If you'd still like to learn the method in this article, then by all means go ahead as you may still find it helpful!

A wonderful site visitor, Margaret, shared with me (months ago!) the link for installing Google Play Store Apps without an android phone which is the basis for this tutorial.
However, I got stuck and it took me awhile to figure it out. I
decided to simplify things for you by cutting out several steps, adding step-by-step instructions, and
showing more images!
A BIG THANK YOU to Margaret for the link and Eweforia for the original tutorial!
Important Notes!
Please read the following before continuing:
- This tutorial WILL NOT connect your Kindle Fire to the Google Play Store (see my FAQs on rooting and Google Play).
- Any apps that require a connection to the Google Play Store will not work, including most apps by Google. :(
- You will not be able to make in-app purchases for any apps put onto your Kindle Fire with this method, since they will not be connected to the Google Play Store.
- Many apps in the Play Store will not be compatible with the Kindle Fire; feel free to try the ones you want to see if they will work.
- This will not work with apps you have to pay for, only free ones.
- Try at your own risk.
Please be aware that I do my best to share safe Kindle Fire resources with you, but I cannot be held responsible or liable for any issues you (or your device) may experience by following the tips, tricks, and tutorials on this website. By following this tutorial you agree to the Terms of Use of this site. Thank you!
What Play Store Apps Can You Use on Your Kindle Fire?
You may be wondering, "What's the point, if you can't use Google's apps, or apps that require the play store?" There are still plenty of apps you can get! Have you seen how big Google's app store is?!

Although you can't install and use Google's official apps, you CAN access most of Google's online tools and resources on your Kindle Fire by going to the Web! Just visit their site, login in, and bookmark any pages you want to revisit later on. If you're having trouble see my page on mobile vs desktop sites.
I mostly use this method to get apps from misc companies that have not added their apps to Amazon's App Store or 1Mobile, but I've also had fun browsing through the huge Play Store to find new apps and games to try.
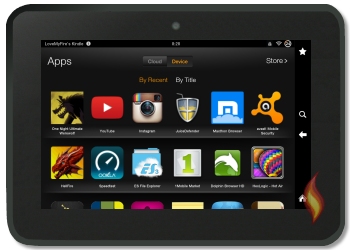
Here are some of the apps I've successfully installed onto my Kindle Fire:
- HellFire
- JuiceDefender
- Maxthon Browser
- One Night Ultimate Werewolf
- Speedtest
- YouTube (videos play but you can't login with your Google account)
What You Will Need Beforehand
This tutorial is advanced and although it's not difficult, it does take some time and a little skill. However, I have tried to make it as simple and as clear as possible.
Here's what you need before starting this tutorial:
- A computer where you can install software and save files
- A Google account: ie: gmail, youtube, google+, etc. They are all connected so if you have any kind of Google login you just need to know your username and password.
- A way to transfer files from the computer to your Kindle Fire: USB cord, WiFi Pro app, Dropbox account, etc. (I'll show you some of these)
- Allow Installation of third-party apps (explained next)
If you have not yet learned how to side load apps on your Kindle Fire you will need to go through that tutorial to understand the basics of side loading apps, so do this first.
Although you don't need to side load the 1Mobile Market as shown in that tutorial, you WILL need to allow your Kindle Fire to install third-party apps. However, having access to another big app store has its benefits.
When you're done, come back over here and try out this advanced tutorial on side loading Google Play Store apps to your Kindle Fire.
Install BlueStacks on Your Computer
|
Alright, now that you're ready, let's begin! On your computer go to www.bluestacks.com and download their "app player" software. If you use Windows 7, 8, XP, or Vista select the green button on the left. Mac users select the one on the right. Since I use Windows 7 I pick the one on the left: |
 If you have a smart phone or other tablet that can access Google's Play Store, you don't need to use BlueStacks, just skip ahead to the section, "Install ES File Explorer App". |

Depending on which version of Windows you have, your options and screens may be a bit different. Click the "Save File" button:
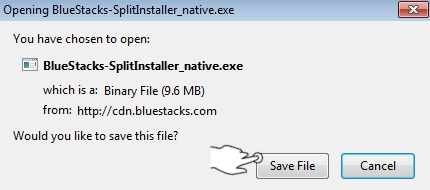
Save the file to your desktop (or other location) for quick and easy access:

Go to your desktop (or wherever you saved the file) and double click on it to run it:
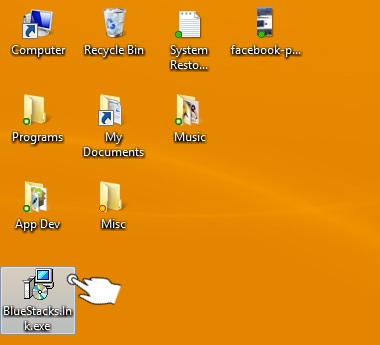
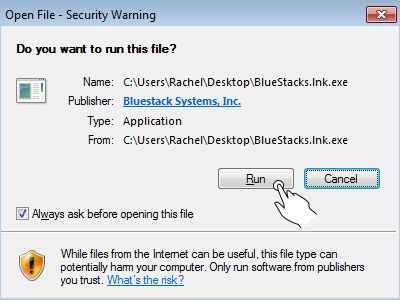
If any security warning screens open up, go ahead and "Run" or "accept" them:
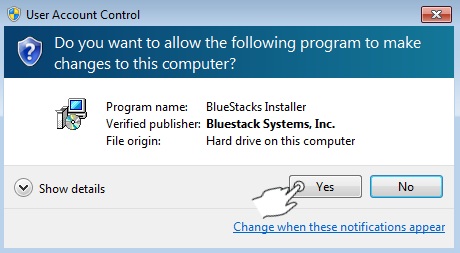
I also get the following window to allow BlueStacks to install. Click "Yes":
You should see the following screen warning you that "By clicking Continue, [you] accept the terms in the license agreement". If you do, click "Continue":

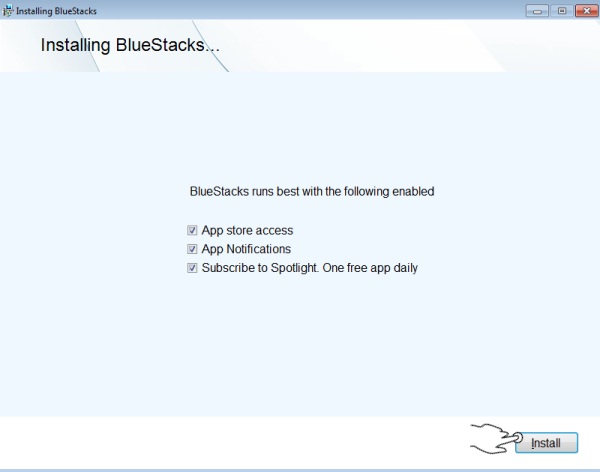
BlueStacks asks you which options you wish to run. I'm not sure if you need any of them, but just in case I went ahead and left them. When you're ready, click "Install":
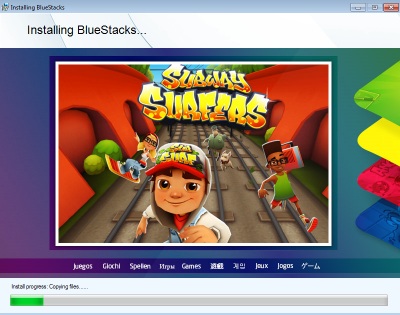
The installation of BlueStacks will take several minutes to complete:
When it's installed, it will begin to load:
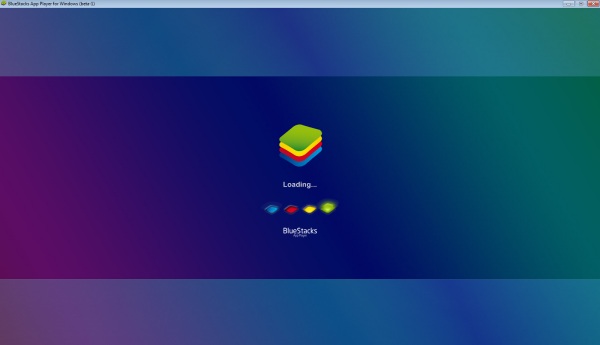
When the program is done loading you should see a screen similar to this:
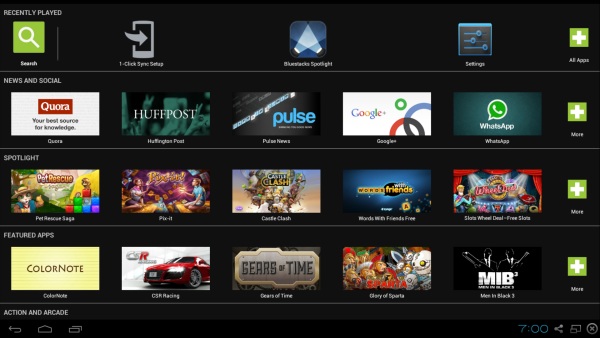
I highly recommend clicking the "window" button at the bottom right which will put the software into a regular window vs full screen. This is optional but easier to work with, in my opinion:
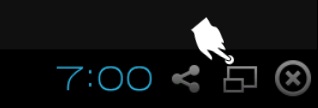

If at any time you need to back up or cancel a screen, just hit the back arrow (bottom left in BlueStacks) or the "Esc" key on your keyboard.
Connect BlueStacks to Your Google Account
If the "One time setup" window to "Enable AppStore" (shown farther below) doesn't pop up, click the Search icon at the top left:
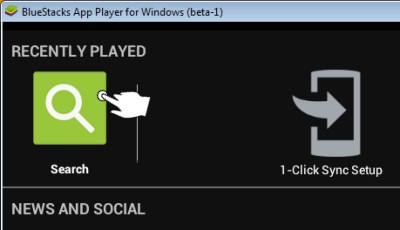
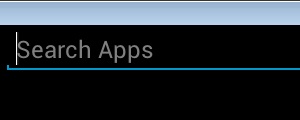
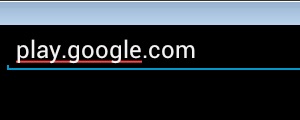
A search field will open. Type "play.google.com" and then hit the "Enter" key on your keyboard:
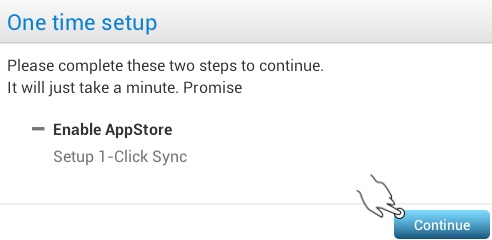
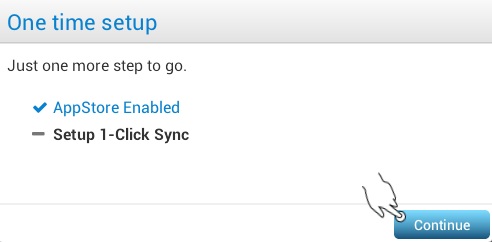
You should get the "One time setup" screen. Thankfully you only need to do this part once. Click "Continue":
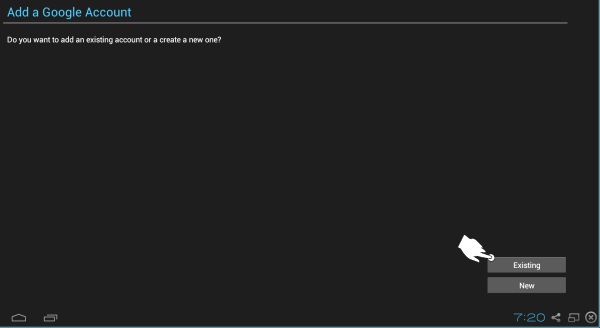
Click the "Existing" button:
Sign in to your Google account with your email address and password then click "Sign in":
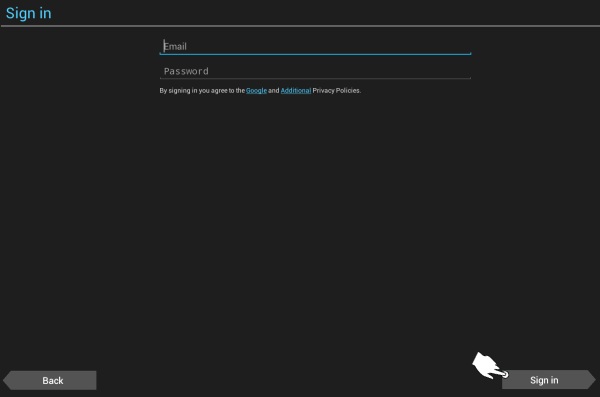
I personally removed the checkmark allowing Google to backup and restore, but I don't think it matters either way. Click "Next":
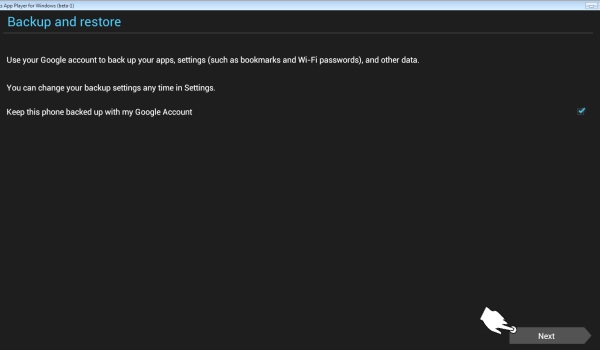
Now that we're done with the first step, it's time to complete the second one. Click "Continue":
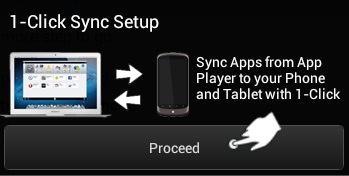
Click "Proceed":
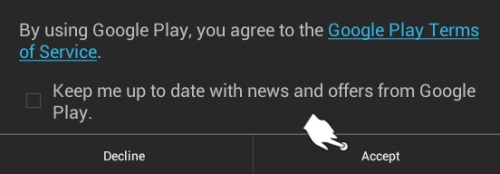
If you accept Google Play's Terms of Service, click "Accept":
Find and Install a Launcher App
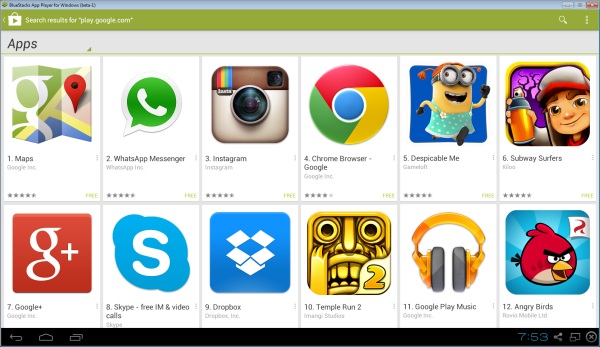
You should now be taken to the Google Play Store. If not, tap the search field at the top left again and type "play.google.com". Google's Play Store will look something like this:
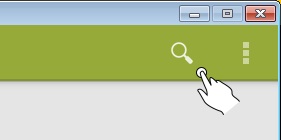
The first app we're going to install in BlueStacks is a launcher to make it easier to quickly access the Google Play Store. Tap the search icon at the top right:
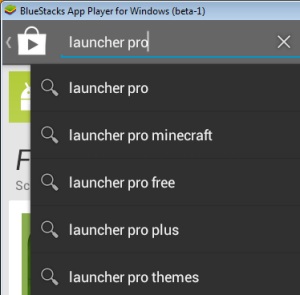
In the search field that appears at the top left (for some reason it's not on the right side where the search icon was) type "launcherpro" (or any other launcher if you know of another you'd prefer to use) and hit "Enter" on your keyboard:
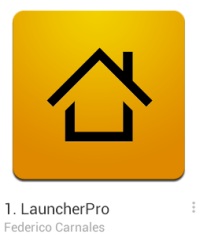
Find and click on the LauncherPro app:
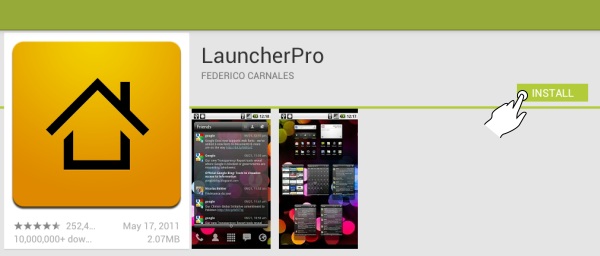
Click "Install":
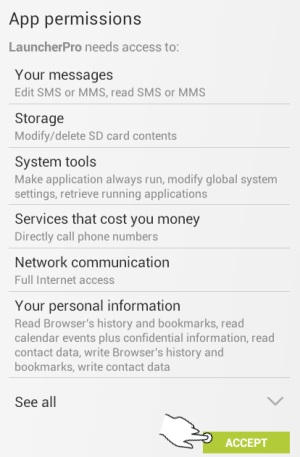
If you accept the app permissions click "Accept":
The app will begin to download. When complete you'll see a notification momentarily popup at the bottom right of your screen stating that the app has successfully installed:
Now tap the Home button at the bottom left:
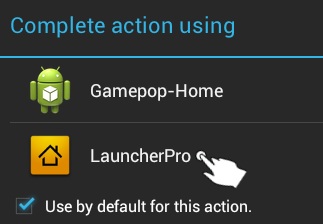
You'll be asked which launcher you wish to use.
Click the "Use by default for this action" check box at the bottom:
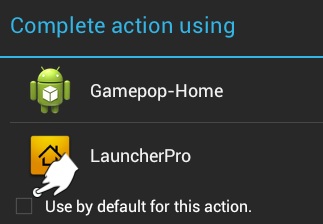
Now click on LauncherPro:
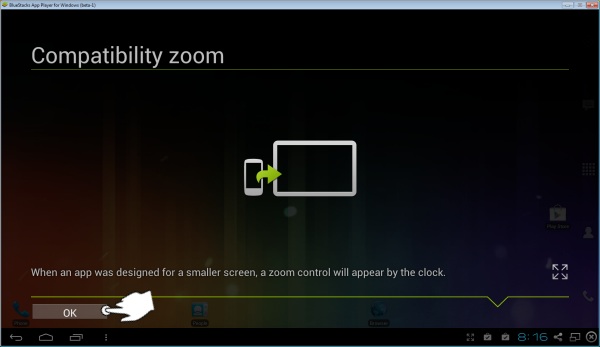
LauncherPro opens with a "Compatibility zoom" message. Click the "Ok" button at the bottom left:
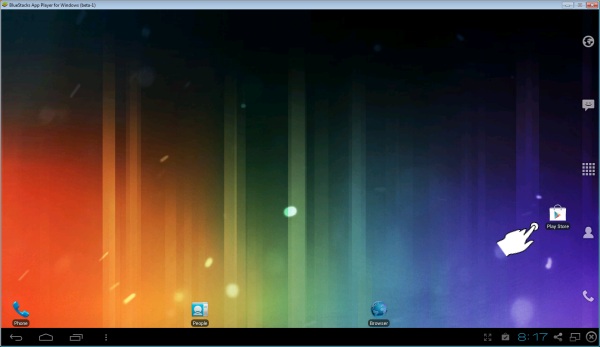
You should see the Play Store icon somewhere on the screen. Tap it:
Install ES File Explorer App
Now we need the app that's the second star of this show, ES File Explorer!
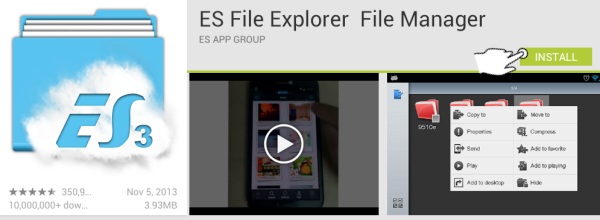
Do another search in the Google Play Store (search icon is at the top right corner), this time for "es file explorer" and remember to hit your "Enter" key to activate the search. Tap and click on the app's icon:
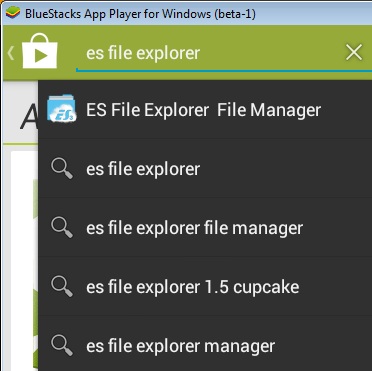

Now install this app in BlueStacks by clicking the Install button:
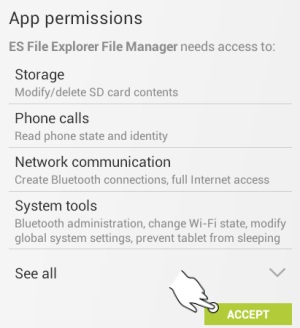
To accept the app's permissions click "Accept":
When the app has been downloaded and installed the following message will briefly appear at the bottom right corner where notifications appear:

Find and Install Google Play Store Apps You Want on Your Kindle Fire:
Now it's time to search for apps in the Google Play Store that you want to put on your Kindle Fire.
For this example I'll only be installing one app, but you can install as many as you want, or you can try one now and install more later.
I'll be installing "One Night Ultimate Werewolf" which is the app I wanted when I finally learned how to do this. (This app is a companion for an awesome werewolf card game, which is a cooler, faster, and better version of the popular social game, Mafia.)
Just like we did with the other apps, search for your app. When you find it, click on it then click the install button.
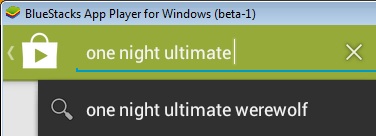
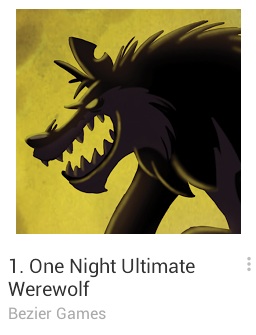
After finding and installing the Google apps you want on your Kindle Fire, tap the Home button at the bottom left:
You should now see in LauncherPro, all the apps you've installed, including ES File Explorer:
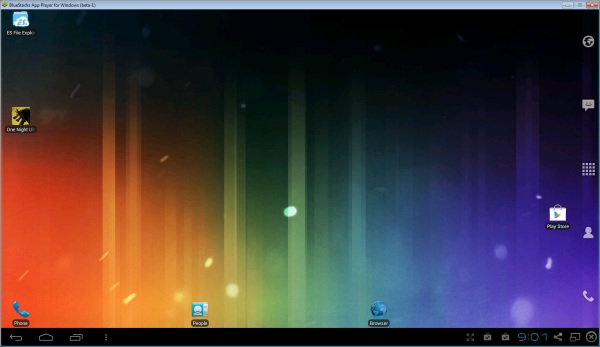

Feel free to open and play with any of the apps you install. That's what's really cool about BlueStacks, you can play android apps on your computer!
Back Up Your Google Apps
The next step of the process is to back up your installed apps to get the apk executable file. Open ES File Explorer from the LauncherPro screen in BlueStacks:
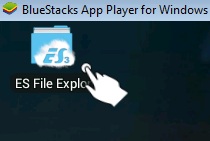
The very first time you open this app you'll seen an instruction screen, which doesn't apply in BlueStacks. Click the screen to go to the next screen. You'll need to do this two more times (for a total of three instruction screens):
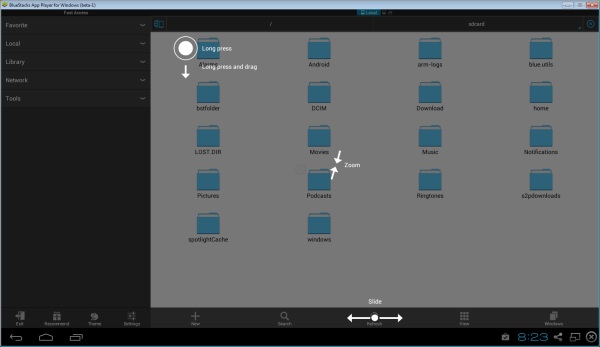
The ES File Explorer app screen should look like this:
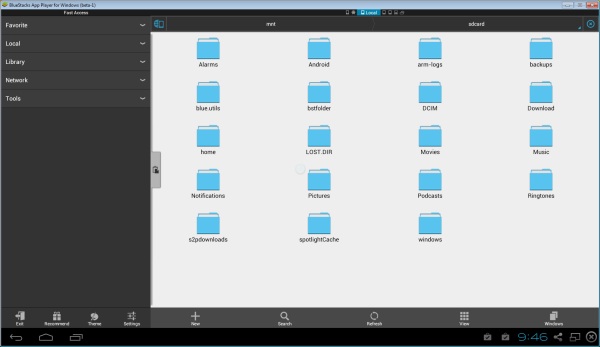
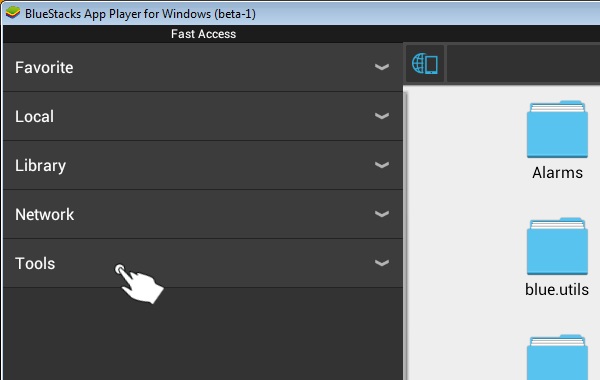
Find and click the "Tools" drop down option in the far left column:
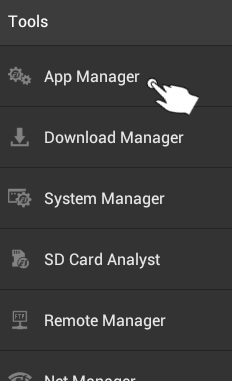
Click "App Manager" which should be the top option:
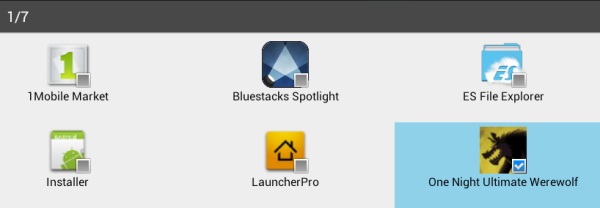
You should now see all the apps installed in BlueStacks.
Find one of your apps. Click and HOLD DOWN on the app's icon, if you just tap it the app will open:

A check box will appear at the bottom right of each icon. The one you selected will be checked. Click to select any other apps you want as well:
Now tap "Backup" in the list of options at the bottom of the window:

You should see the following notification temporarily pop up in the bottom middle of the screen:
Copy Apps from BlueStacks to Your Computer
Excellent. Now we're going to copy these backed up files to your computer.
Look at the top of the app's screen for a tiny blue triangle, to the right of "User Apps". Click it:

A drop down list will appear. Click "Backup Apps":
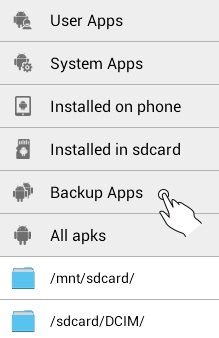

If, for some reason, you don't see the "Backup Apps" option, just go back to the main screen in ES File Explorer (it's the MINISCULE phone icon at the top center of the screen, the one on the far left) and then click the "Backup" and "Apps" folders. Now you'll be there!
You will only see the apps you backed up. These should all be "apk" files.
Tap and HOLD DOWN on an app, because if you just tap it once it will run the file, if it does, just cancel and try again.
Once again the check boxes will appear. If you have more than one app at this time, tap and click each additional app to select it:
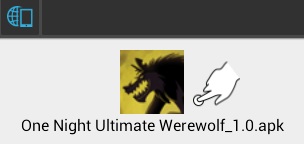
Now click the "Copy" button in the list of options at the bottom:

Click on the tiny blue triangle at the top of the screen, to the right of "Backup Apps":
Click "/mnt/sdcard/" to return to the start screen of ES File Explorer:
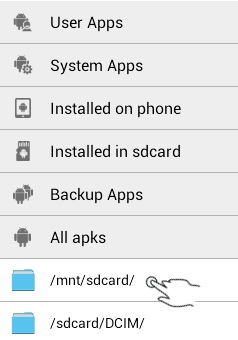

If, for some reason, you don't see the "/mnt/sdcard/" option, just go back to the main screen in ES File Explorer (it's the MINISCULE phone icon at the very top center of the screen, the first icon in the list). Then continue on with the tutorial!
If your computer uses Windows, look for a "Windows" folder:

For Mac users, I don't know what folder you'll have, but the one where your main documents usually save. The folder in ES File Explorer might show the names of the files in that folder on your Mac, like the ones shown on mine in the third image below.
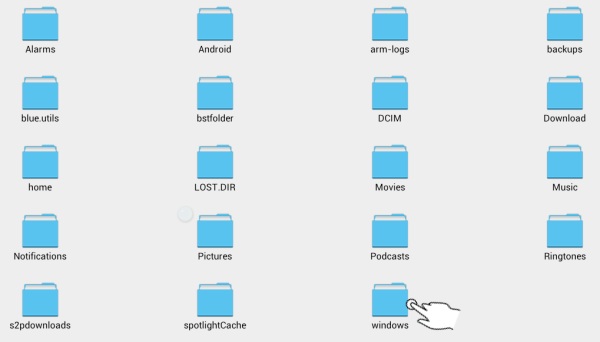
Click on "Documents":

You should now see the names of folders and files that are actually in your "My Documents" folder on your computer:
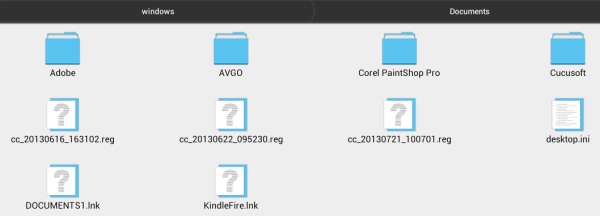
Click the "Paste" option at the bottom of the screen:

Another notification message will briefly pop up to let you know that the file was successfully copied:
Go to your "My Documents" folder on your computer. You should now see the apk file for any apps you backed up and copied over:
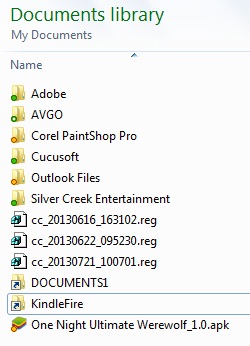
Yep, One Night Ultimate Werewolf is there!
Side Load Google Play Store Apps to Your Kindle Fire!
Now it's time to get these bad boys onto your Kindle Fire! There are two things you will need to do at this stage of the game:
- Transfer apk files from computer to Kindle Fire
- Install apk files
1. Transfer APK Files from Computer to Kindle Fire
First, you'll need to transfer the files onto your tablet. There are several ways to do this:
- Transfer by cable
- Transfer by app
I decided to type up a separate article just for this part of the tutorial, mostly because it will be super useful for those who just want to transfer files and not side load apps from the Google Play Store.
So head on over to that tutorial: how to transfer files to your Kindle Fire. Pick the transfer option you prefer, transfer over all the "apk" files from your computer to your Kindle Fire and then you'll be ready to install them!
2. Install APK Files
If you don't remember how to find and install the apps as explained in my side loading tutorial, just head over there now and see the section titled, Install the Android App.
That's all there is to it! So try it out for yourself and see what Google Play Store apps you can now use on your Kindle Fire.

Please note that some side loaded apps may not work on your Kindle Fire, even if they seem to install fine. If you get errors or have problems with an app not working as it should, it's probably not fully compatible with our beloved tablets. :(
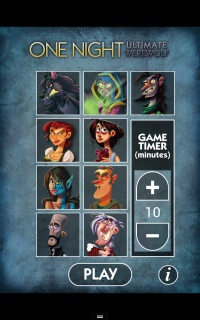
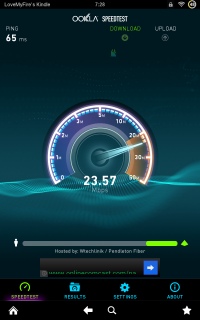
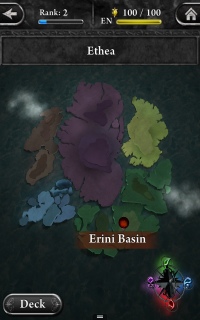
Here are screenshots of some Google Play Store apps and games I successfully put onto my Kindle Fire:
One Night Ultimate Werewolf:
Speed Test:
HellFire:
I'd love to know what apps and games you successfully install and play on your Kindle Fire, so please share them with me in the comments below!
Why It's Taken Me So Long to Figure This Out!
A little while after getting my first Kindle Fire I tried to figure out how to get Google apps onto my tablet. I found a few different tutorials at the time, that I tried to follow.
With one of them I tried using my husband's smart phone (which I loath using) but I had trouble figuring it out, probably because I had little Android experience back then- I understand a lot more now!
With another one I tried using BlueStacks on my computer (it was an older version at the time) but I couldn't get it to work back then either.
I figured
it was too difficult and took too much work, so I'd just wait until developers put their apps into Amazon's App Store,
which a lot have, thankfully. However, over the years I've found that a lot of smaller businesses
only put their Android apps in Google's App Store which is so frustrating!
Well, the
other day I really wanted that werewolf app for a big game party I was hosting, but it was only in the Play Store *grumble grumble* so I decided it was
time to bite the bullet and finally figure this out! And I'm so glad I did!
Although it took me several days to put together this tutorial, I feel it was worth it. I believe you'll enjoy trying out Google apps on your Kindle Fire too!
After taking on this challenge, you're ready for any of my other Kindle Fire tips & tricks and other resources!
Or, if you'd like to try another method, see this post from my website buddy, Android Cowboy: How to Get Android APK files with a Virtual Android Emulator. I personally haven't done it myself (I've been working hard to get this tutorial done), but it looks pretty cool!

If you found this article helpful please let me know in the comments below or share it with a friend (share links are at the bottom of this page under the comments). Thanks!

Hand Illustrations provided by GestureWorks® (www.gestureworks.com). Aren't they perfect?



Leave a Comment:
I love receiving your comments, but please read the notes below before posting. Thank you!NOTES:
- I continue to receive questions I've already answered in my FAQ or in articles on my site. PLEASE check there first!
- All comments are moderated. If you leave the page you won't see your comment until it is approved.
- Select the "Post to Facebook" check box to be notified on FB when a reply has been posted.
- If you scan the previous comments you may find an answer to your question. Click the "View X more" link at the bottom (if visible) to see all comments.
- If you're having trouble accessing my exclusive Kindle Fire articles, please email me directly instead of posting in these comments.
Thanks for sharing!